I use VS Code for most of my application development work. For SQL development, I wanted to try Azure Data Studio, which is a sort of sister product to VS Code for database development and management. This post is an example of how to use Azure Data Studio and Flyway as part of managing a PostgreSQL database pipeline on Heroku. In this post, we will be creating environments and databases in Heroku and connecting to them from Azure Data Studio.
Prerequisites
- Install PostgreSQL on your local machine and add the PostgreSQL bin directory to your path
- Download and install Azure Data Studio
- Install the PostgreSQL extension for Azure Data Studio
- Create a free Heroku account
Scenario
We will be creating a database for an animal rescue organization to keep track of animal adoptions. This simplified example will include 4 tables:
- animals: table for storing information about the animals
- animal_notes: table for storing date-specific activity or notes about the animal
- owners: table of people who have adopted animals
- shelters: table of animal shelters from where animals came, if applicable
Set up the Databases and Heroku Environments
Step 1: Create a pipeline in Heroku with production and staging apps
Create a new app for the production environment:
- Name: demo-app-prod
- Select the option to add to a pipeline and create a new pipeline
- Pipeline name: demo-app
- Stage to add this app to: Production
- Click “Create app”
Create the app for the staging environment:
- Navigate to the demo-app pipeline and in the “Staging” column, click the option to add an app and then the option to create a new app
- Name: demo-app-staging
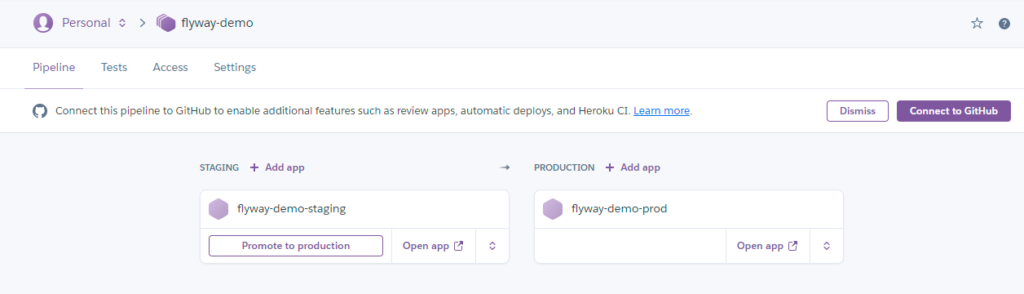
At this point, you’ve set up multiple environments for a simple application development pipeline in Heroku. Your pipeline should look something like this
Step 2: Add Heroku Postgres to the apps and connect to the databases from Azure Data Studio
Production Environment
Set up and connect to the production database:
- From the pipeline page, click the name of the production app
- Click the “Resources” tab
- In the Add-ons section, search for “postgres” and select Heroku Postgres
- Leave the default “Hobby Dev – Free” option and click Submit Order Form
- Once the database is add, click the database name and click the “Settings” tab
- Click the button to “View Credentials…”
Connect to the production database from Azure Data Studio
- In Azure Data Studio, create a new connection
- Connection type: PostgreSQL
- Server name: copy the value from Host
- Authentication Type: leave default
- User name: copy the value from User
- Password: copy the value from Password
- Database name: copy the value from Database
- Name (optional): add a descriptive name, e.g. demo-app-prod
Staging Environment
Repeat the steps above to create a database in the staging app and connect to the database from Azure Data Studio.
Step 3: Create a local database and connect to the database from Azure Data Studio
Set up the local database
In order to complete this part, you need to have installed PostgreSQL on your machine and added the installation directory to your path (See the “Prerequisites section).
Use the following commands to create a new database.
# Replace username with the username you used when installing PostgreSQL
createdb -h localhost -p 5432 -U username demo_db
# Enter your password when prompted

# Now connect to the database server and verify that the database was created
# Replace username with the username you used when installing PostgreSQL
psql -U username

# You are now connected to the database server. Display a list of databases and verify that your new database has been created
\l
Connect to the local database from Azure Data Studio
- In Azure Data Studio, create a new connection
- Connection type: PostgreSQL
- Server name: localhost
- Authentication Type: leave default
- User name: username you used to connect to the database server
- Password: password you used when connecting to the database server
- Database name: enter the name you used when creating the database in command above
- Name (optional): add a descriptive name, e.g. local-postgres
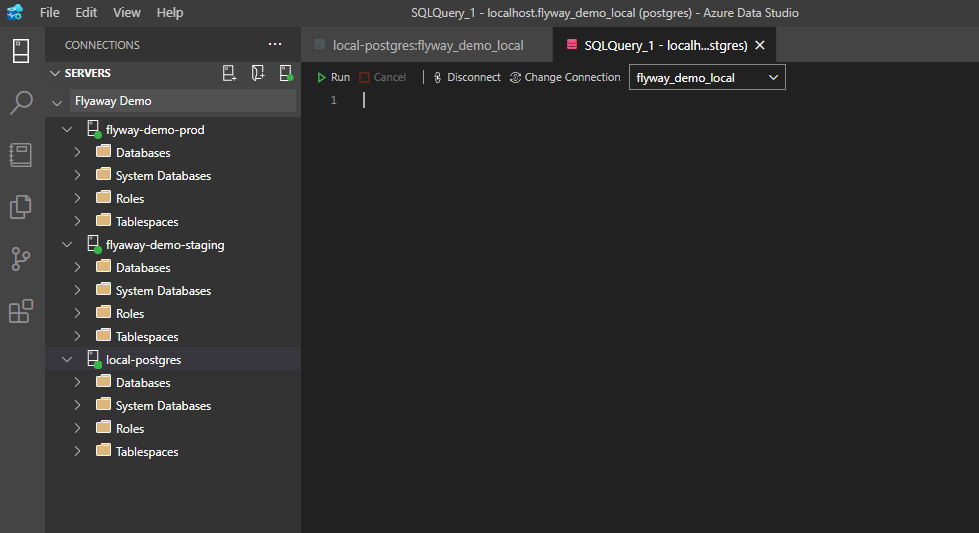
Your Azure Data Studio connections should look something like this
Summary
At this point, we have set up three environments with corresponding databases and in the next post we will run SQL scripts to create the data model and use Flyway to replicate the data model in each of the environments.
Resources
- Microsoft Docs: Azure Data Studio Overview
- Heroku Documentation: Heroku Postgres


